
はじめに
Windows 10には、リモートデスクトップという、PCを遠隔操作するための機能が搭載されています。ただ、リモートデスクトップはWindows 10 Homeでは有効化できない仕様になっています。しかし、今回の記事で解説する設定をすれば、Windows 10 Homeでもリモートデスクトップが使えるようになるかもしれません。
実行環境
- Windows 10 Home
- RDP Wrapper v1.62
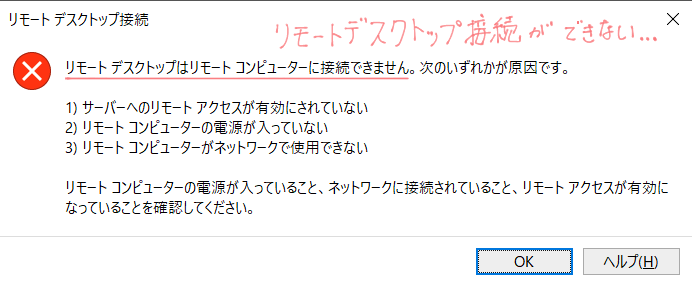
Windows 10 Homeでは、リモートデスクトップが使えない
Windows PCを遠隔操作する際に役立つリモートデスクトップ接続ですが、残念なことにこれはWindows 10 Home Editionでは使用することができません。つまり、Windows 10 Home EditionのPCからWindows 10 Pro EditionのPCへリモート接続することはできるが、その逆ができないということです。
ただ、RDP Wrapperというライブラリを使用すれば、Home EdittionのWindows PCをホスト側(リモートデスクトップの受け手側)のPCとして使えます。
RDP Wrapperをインストール
これから解説する設定は、Microsoft公式のものではないので、これによって生じた不具合等については責任を負いかねます。すべて自己責任でお願いします。
-
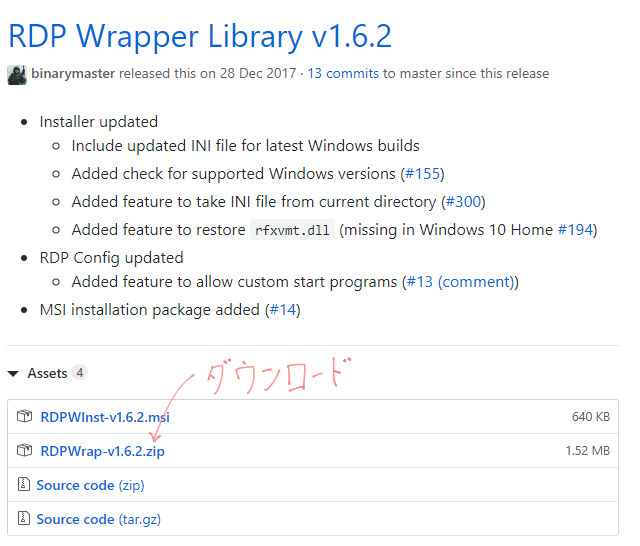
RDP Wrapperのダウンロード
次のリンクからRDP Wrapperをダウンロードします。
-
展開
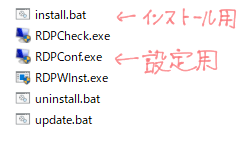
zipファイルのダウンロードが完了したら、適当な場所に展開します。
-
管理者権限でコマンド実行
先ほど展開したファイル内の[install.bat]を右クリックし、[管理者として実行]で実行します。
-
RDPconf.exeで設定
[RDPconf.exe]を実行し、RDP Wrapperの設定をします。[Enable Remote Desktop]がチェックされた状態で、[Diagnostics]内のすべての項目の文字が緑色になっていればリモートデスクトップを使用できます。
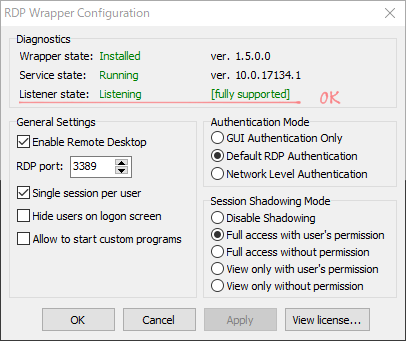
もし赤色の場合は次の章の手順に従ってください。
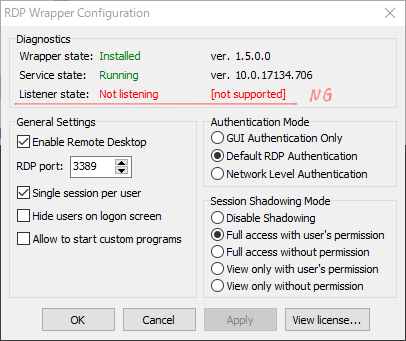
Lister Statusが赤字のときの対処法
- Stop the service
- Open admin command prompt window (search CMD, right click, run as admin)
- type net stop termservice and press enter
- Leave window open to start service later (optional)
- Move new dll
- Open Explorer, type system32 to go to the system32 folder.
- Search and find termsrv.dll
- Open the file’s properties.
- Go to Security.
- Click Advanced.
- Click Change next to owner.
- Type your username and press enter.
- Press Ok.
- Back in the security tab (step 4) Click Edit.
- Under Group or user names Click on your username
- Check the Allow Checkbox next to Full Control.
- Press OK.
- Drag and drop the new termsrv.dll File into the System32 folder. (found here, same link as above) termsrv.zip
- When prompted to replace, hit yes.
- Now we want to change the settings back.
- Follow the same steps to get to the window in step 11.
- Under your username, uncheck modify and write.
- Press Ok.
- Follow the same steps to get to the window in step 7.
- Now type in NT SERVICE to make TrustedInstaller the owner again.
- Press Ok.
- Done!
- Start the service
- If you didn’t leave the admin window open, open a new one.
- type net start termservice and press enter
- Enjoy RDP
Note: if you get an error related to signing in (I.E. it quits right away or says there are too many connections) a restart of the host should fix it. It’s caused by previous attempts still being marked as connected in the windows software, even though it’s not.
設定が完了したら、再度[RDPconf.exe]を実行します。[Enable Remote Desktop]がチェックされた状態で、[Diagnostics]内のすべての項目の文字が緑色になっていればリモートデスクトップを使用できます。
RDP Wrapperの設定
以下、RDP Wrapperの細々とした設定項目です。基本的には何もいじらずに、デフォルトのままで問題ありません。
General Setting(一般的な設定)
- Enable Remote Desktop(リモートデスクトップの有効化):チェックするとリモート接続できるようになる。
- Single session per user(ユーザーごとの単一セッション):チェックすると接続された側がロック。
- Hide users on logon screen(ログオン画面からユーザーを隠す):チェックすると、ログオン画面にユーザーを表示しない。
Authentication Mode(認証モード)
デフォルトの2番目で特に問題ないです。 以下、安全性の低い順に並んでいます。
- GUI Authentication only(GUI認証のみ)
- Default RDP Authentication(通常のRDP認証)
- Network Level Authentication(ネットワークレベルの認証)
Session Shadowing Mode(シャドーイングモードセッション)
シャドーイングモードとは、複数のPCから同じセッションを参照するモードです。
- Disable Shadowing(シャドーイング無効化)
- Full access with user’s permission(ユーザーの許可でフルコントロール)
- Full access without permission(ユーザーの許可無しにフルコントロール)
- View only with user’s permission(ユーザーの許可でセッションを参照)
- View only without permission(ユーザーの許可無しにセッションを参照)
設定が完了したら[Apply]で適用します。
リモートデスクトップ接続を試してみる
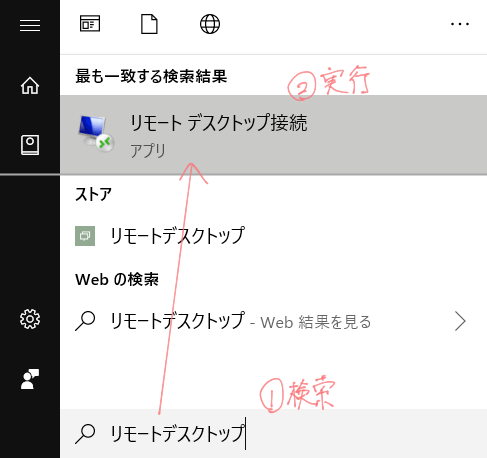
それでは実際に、リモートデスクトップ接続ができるようになったか、試してみましょう。ここでは説明をわかりやすくするために、遠隔操作されるPCをホストPC、遠隔操作するPCをクライアントPCとします。 まず、クライアントPCで検索ボックスに[リモートデスクトップ]と入力し、リモートデスクトップ接続アプリを起動します。
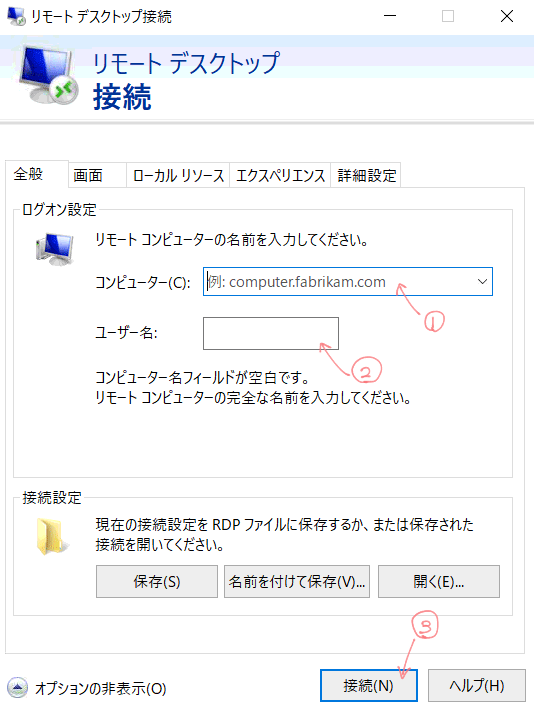
ホスト側PCのコンピュータ名とユーザー名を入力し、[接続]します。
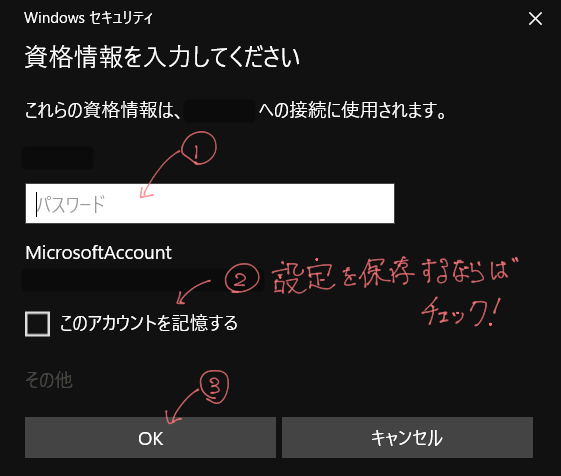
資格情報の入力が求められるので、指示に従って入力します。
無事、リモートデスクトップ接続が開始されたことを確認できます。
TeamViewerのすすめ
Windowsデフォルトのリモートデスクトップ接続を使わなくても、TeamViewerというフリーソフトを使えば、PCを遠隔操作できます。
TeamViewerを使用する際に、実行環境によっては外部ディスプレイの接続がないと使用できない場合があります。そのときにはダミープラグを使って回避できます。